
Modifying npm packages - the right way
Set up the perfect package for your app.
If you are a frontend developer, you may have come across the following situation. You find the perfect dependency for your app. It does everything you need and works well, except for one thing. One little bug, one small aspect of it behaves partially the way it should in your app, and there is no way to set it up right. It is almost perfect, but not quite.
This can be frustrating as you may have already gone ahead and written a lot of code specific to this dependency, which would most likely be wasted if the library is replaced. Also if the dependency was a perfect match in the first place, there might not be others which match your needs like this one, so you would most likely have to compromise.
Using npm as your package manager will save a lot of time and keep things simple. With some extra coding you might get to keep your codebase and the dependency. You may also get some credit from the package authors and contributors and increase your GitHub reputation and on the plus side you get the awesome feeling of fixing or extending something many others are using.
For this you would need the library to be open source, but this is typical for the greater part of the packages hosted on npm. GitHub was just an example as this is used by the vast majority of the package sources, but any other will do too.
- To begin, clone the repo of the source of the package you would like to modify or fork it first and then clone the fork. The repo source is linked in the official npm page of the package most of the time. If the library version is somehow specific to your needs, make sure you select the appropriate commit after the clone.
- Installing the package dependencies should be done by using the ‘npm install’ command issued in the same directory as the package.json file. Now you have to familiarise yourself with building the library. Usually there is a guide in the readme on how to do it, but if there isn’t or it is not up to date, checking the package.json for scripts will do. Note that building the library may need additional dependencies, tools or environment which you have to set up manually.
- If you can build the library, the next step is to fire up your favorite IDE for this task and dig into the code. Be prepared for what you might find, though. I have seen libraries with great code, while it took me long to understand what is going on in others. The comments written in a different language other than English in the source code are usually not of great help either, especially if you do not speak that language. Usually there is a demo included which you may be able to use for testing purposes.
- If you have completed all this, you have to replace the library with the custom modified one to test it in your app. You can overwrite the existing files in the node_modules directory, but that is problematic as the modification will only work on your computer.
- Fortunately, npm is a great partner in this. You should copy the library somewhere in the directory structure of your project. I like using directories named ‘Dependencies’ for this purpose.
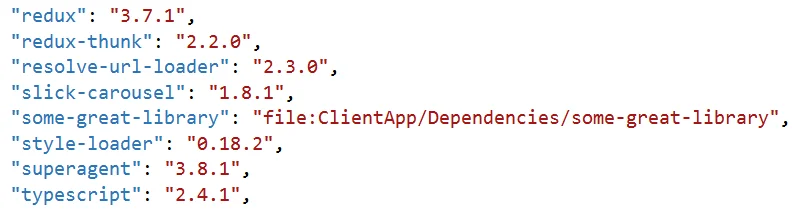
- Open your app’s package.json file and find the row where your library is listed as a dependency or a devDependency.
- Then replace the version number with the path of the modified library directory and a ‘file:’ prefix. For example: "some-great-library": "file:ClientApp/Dependencies/some-great-library". Note that the path must use forward slashes even in Windows and it is relative to the location of the package.json file. In my example, the package.json and the ClientApp directory are in the same directory.
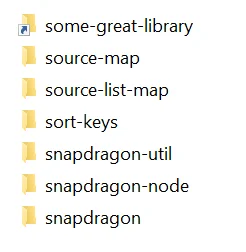
- Next it’s time to “install” the dependencies. Issue ‘npm install’ for this in the directory that contains your app’s package.json. If you like to make sure, you may delete the library directory from the node_modules directory first. After the npm install runs, you will notice that it creates a link in node_modules to your custom library location.
- You may now build and test your app using the custom library. This solution is great because it only relies on how npm works. If your co-workers use npm and you commit the new package.json as well as the custom-built library, it will work for them as well. If your build server uses npm, it will work on that also out of the box.
- After everything is functioning, you should commit your changes (that is, if you have forked the original repo) and create a pull request against the original repository. This way your changes are likely to make it to the official release and you might become a contributor.
One last important thing to note is to make sure to check the license of the library you would like to modify. There is a chance that your Pull Request will not be merged or the package is already abandoned, the author is not available, etc. and it is important to know if you are allowed to use a modified copy within your app.